


Error Code 20:2 (Whoops – the installer encountered an error.)(Please quit and restart the installation. In Origin often appears when some Windows users try to install Origin on a Windows computer, ending up with that error.
This error mainly occurred on Windows 7, Windows 8.1, Windows 10 and Windows 11. So there can be various reasons you face the error with a particular error code.
Here are some points that can be responsible for this error, and you resolve them efficiently by checking out the facts.
Not Enough Disk Space
Insufficient Disk space can cause this error when the system partition has less than 10GB of free space. First, free up the system space to reinstall the game launcher in this situation. It can download from the official download page.
Launch the Origin installer with admin rights
Missing admin rights is an issue that creates the error according to many users. So before making any change, make sure that the installer is opening with admin rights. Some users experienced that when they forced admin access to the Origin installer, they could complete the installation.
Disable and Uninstall 3rd Party Antivirus / Firewall
According to many users, this error can cause 3rd party antivirus of the Firewall. To fix the error, uninstall the active AV and Firewall completely or inactive it. Until the Original has been installed.
Third-party apps
During the process, there might be different apps conflicting with the Original installer, and you will face this issue, especially on Windows 11. But these issues can be avoided by installing the Origin in safe mode networking after booting.
Unpacking installing failure
Unpacking error is one of the leading causes of this issue. This issue looks restricted on the Origin installer thin version. If you are facing an error, you can resolve it bypass it completely installing the app by using a Thin client installer.
Windows Security
Using the Windows security (Windows Firewall and Windows Defender) as a default security suite, it stopped virus signature updating to be controlled as a security measure. This issue can be resolved by installing all pending updates for Windows security or temporarily disabling the real-time protection.
Default VPN program
This error can be occurring if the installer detects an active VPN Program ping booster app or tunnelling. The only solution is there: you have to uninstall the VPN temporarily during the installation.
previous installation cache files clear
If you have already installed the Origin on the same system and now facing the error while reinstalling the game launcher. So this error can be a cause of some cache files that are still there. Clear all the cache files by performing manual steps to fix them.
Recommended: Simple and latest Methods to Fix YouTube Daily Quota Limit Exceeded Error
These are the reasons that can cause the error; below steps mentioned to fix the Error Code 20:2 Origin issue.
How to Fix Origin Won’t Install with Error Code 20:2?
1. Free up the Disk Space
Before starting an Origin launcher, don’t forget to free up disk space on the system partition if you face an error.
Note: if you want to install the game on a secondary partition, if the system partition drive is filled to the brim, the Origin will not install.
According to many users, 10 GB of free space is enough, but the best option is to keep at least 30 GB of free space on your PC partition.
You can get the free space by using the Windows Cleanup Utility on your system partition.
Using the automated approach will save the files mistakenly deleted that you don’t want to remove.
Here is the detailed information to the Disk Cleanup utility to free the space on the PC.
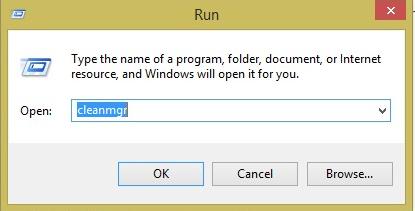
- To open a Run dialog box, press the Windows key + R . Now, inside the text box, type ‘cleanmgr’ and tap on Enter to open the Disk Cleanup utility.
- Depending on the User Account Control (UAC) settings, at this point, a prompt might be shown to grant admin access. If this happens, tap on yes to give the admin access.
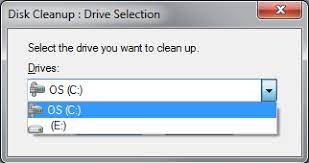
- At the first prompt of Disk Cleanup, choose the Windows drive from the drop-down menu below (the one with the windows logo).
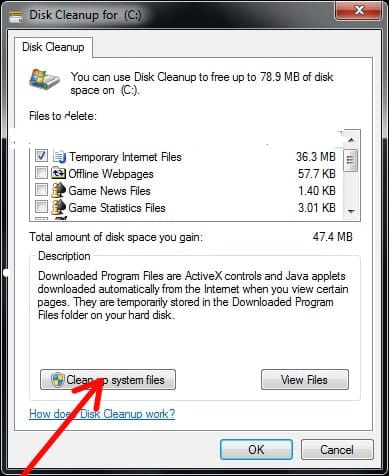
- Once open the Disk Cleanup utility, check the all following boxes; don’t leave anything without checking.

- Tap on Clean up system files, then tap on the Yes at the User Account Control prompt.
- Wait for completed the initial scan, now tap on Ok and make sure that temporarily files have been deleted.
- Once enough files are cleared, reboot the system and wait until the next startup is complete.
- Now go to the official download page, install Origin, and check the installation error status. If the error code is still there, then apply the next solution
2. Launch the Origin installer with admin rights
Before starting, make sure the Origin installer has admin rights. This is a common problem that Windows 10 users face using the aggressive User Account Control settings.
You will face the Origin error 20:2 if your operating system rejects the admin rights to the Origin installer.
Here are the guidelines for downloading the latest Origin installer version and running it as admin rights.
- Open the official download page of Origin on your browser.
- Scroll down to the Windows section inside the download page and download the latest Windows installer.

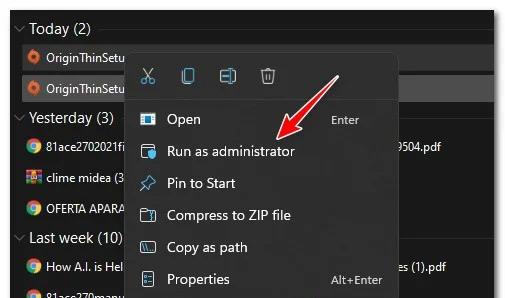
- After downloading the installer, go to the location (Downloads folder) where it was downloaded, right-click on it, and tap on the Run as Administrator from the context menu.
- Complete the installation steps and see if the error is removed or still you are facing it.
If there is still a problem installing the Origin with the same 20:2 error, go to the next potential solution below.
3. Disable and Uninstall 3rd Party Antivirus / Firewall
One common problem can be of 20:2 error when installing the Origin in the firewall suite or unsecured antivirus.
This issue seems with security suites that have the firewall components attached as the third party firewall ends up blocking the connection between Origin servers and your system.
You can avoid this issue by temporarily disabling real-time protection in many situations. This can be done from the settings menu of the AV, or you can do it by right-clicking on the taskbar button and disabling the active shields.
In this situation, you can resolve the problem by temporarily uninstalling the overprotective security suite. Here are the steps to do this.
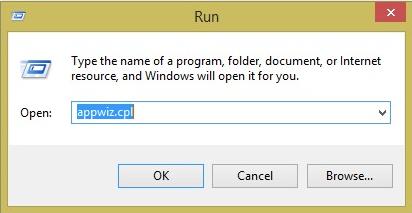
- To open the Run dialogue box, press the Windows key + R. type the ‘appwiz.cpl’ Inside the Run dialog box, then tap on the Enter to open the Programs and Features
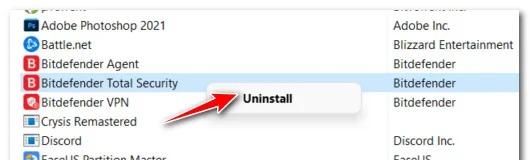
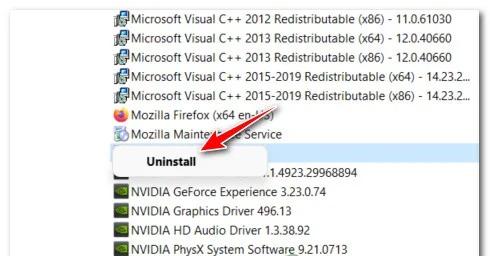
- Once open the Programs and Features menu, scroll down via the list of installed programs and find out the security suite you suspect is interfering with Origin installation.
- When you find out the security suite you want to uninstall, right-click on it then from the context menu, choose the Uninstall that just appeared.
- To complete the uninstallation process, follow the guidelines on-screen prompts, reboot the system, and wait for boot back up.
- Now try to install Origin from the official download page and check if the 20:2 error is resolved or not.
If the error is still not resolved, go to the next solution.
4. Windows Defender and Windows Firewall Disable Temporarily
In the case of using Windows Security and not choosing to update the security signatures, it might be possible that the active security suite will consider Origin as a potential security threat.
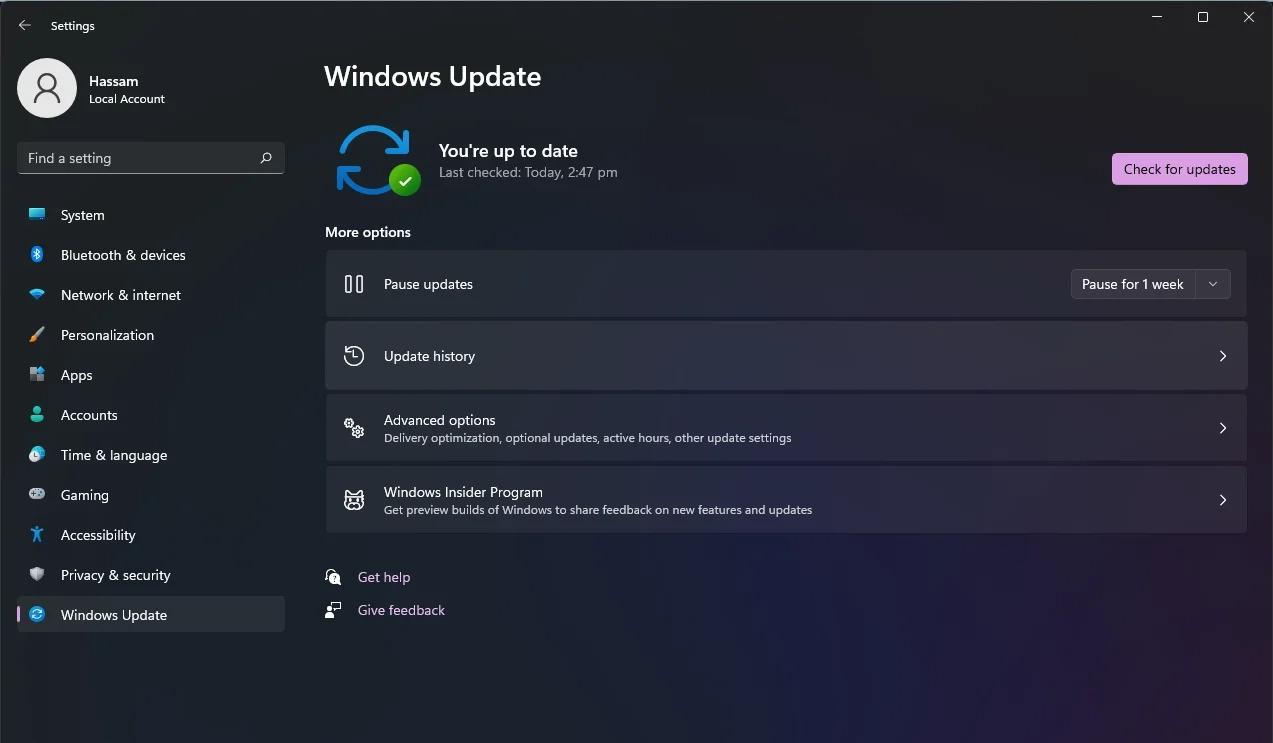
Install every Virus Signature update through Windows Update to handle this situation.
If you can’t update the Windows Signature, then this error is to disable the Windows Firewall real-time protection.
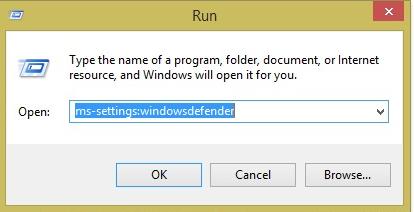
- To open the Run dialoge box, press Windows key + R. Now, in the run box, type’ ms-settings:windowsdefender’ then tap on Enter to open the Windows Defender Security Center.
- When Windows Security tab open, go to the right-hand option and tap on Open Windows Security.
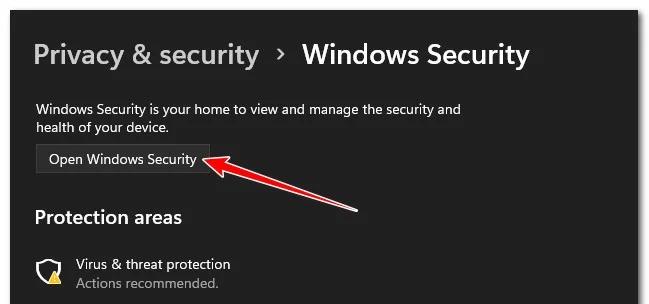
- From the next cluster of options, tap on the Virus and Threat Protection.
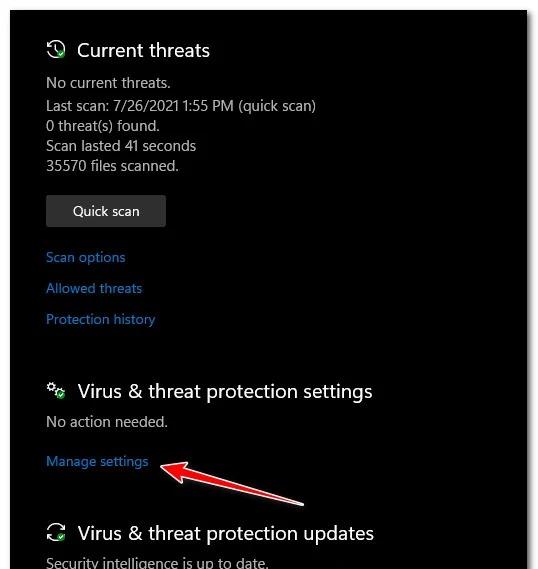
- Now, scroll down to Virus & threat protection settings , then from the context menu, tap on Manage settings.
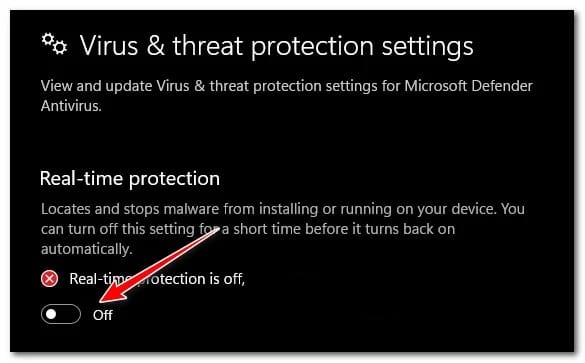
- Once open the custom Virus & threat protection settings, scroll down to the Real-time protection settings, then switch the toggle to turn OFF.
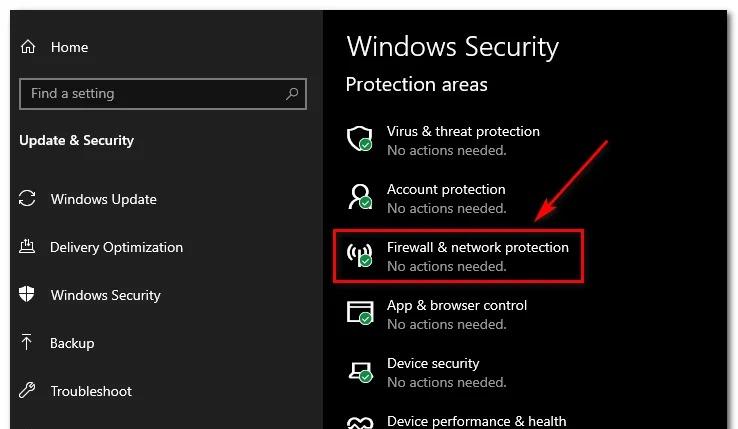
- When the Real-Time protection is turned off, go back to the initial Windows Security menu, move over to the right-hand option and tap on the Firewall & network protection.
- At the following menu, tap on the currently using network (work or home).

- Now, scroll down via items list and disable the toggle related to Windows Defender Firewall. Be sure it’s set to
When Windows Security Antivirus and Firewall are disabled, now attempt to reinstall Origin and check the 20:2 error states.
5. Installing Origin in Safe Mode with Networking
In the installation of Origin, many third-party processes interface, especially with Windows 11.
You can avoid most of these issues to force the system to boot in Safe Mode with Networking.
Below are the steps to install the Origin after booting in safe mode with Networking.
This solution is best for Windows 11, Windows 10, Windows 8.1 and Windows 7.
- Open the Start menu by pressing the Windows key; next, tap on the power button and hold the Shift key while clicking on the
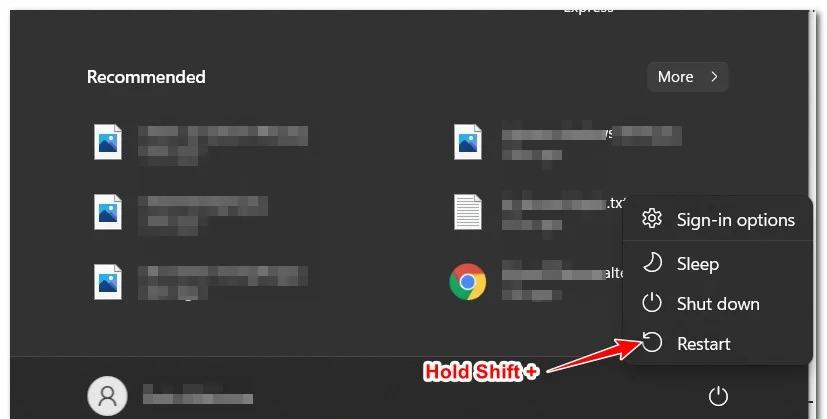
Note: This process forces the PC to restart directly into the recovery menu, allowing you to trigger a Safe Mode boot.
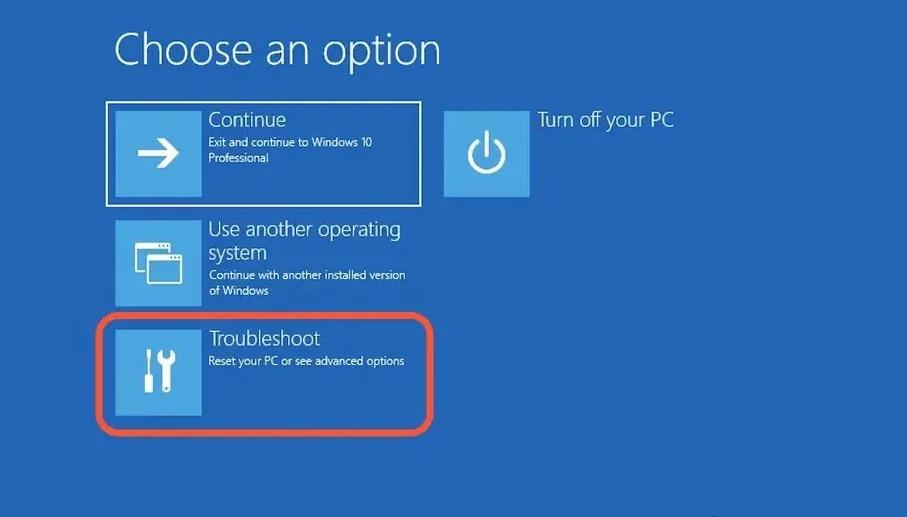
- Wait for system boots into the Advanced Recovery When inside it, now from the available options, tap on Troubleshoot.
- Once open the Troubleshoot menu, tap on Advanced Options and Startup Settings.
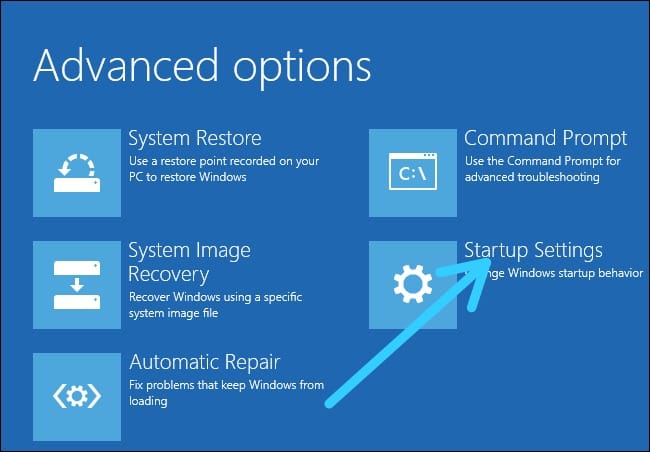
- A prompt will appear to confirm the restart option inside the Startup settings. Now click on Restart at the prompt to do it.
- Now your system will restart directly into the Startup Settings Boot your Windows installation in Safe Mode (with Networking) and press the F5 key when opened.
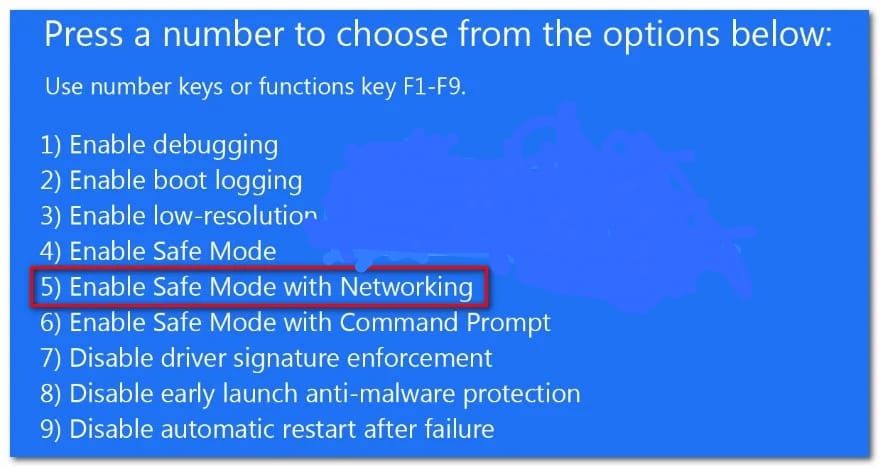
- When the process is complete, and the PC successfully booted in Safe Mode with Networking, on your browser, open this official download page of Origin.
- Tap on the Download icon belonging to Windows, now double-click on the installer (once the download is complete) and follow the on-screen instruction and complete the installation.
If the error is still there, then follow the next solution.
6. Previous installation cache files clear
If you have installed Origin on this system, there might be some cache files data left by the previous installation. In this situation, you will face the error 20:2. This kind of issue will occur from the Origin cache folder.
This error can be fixed once you access the AppData folder and completely delete the Origin cache files. After doing this, try to install the Origin. Here are the steps for this process.
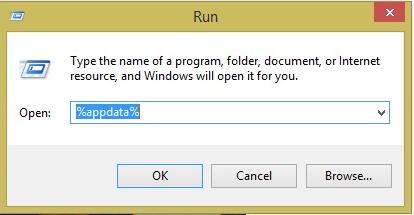
- To open a Run dialog box, press the Windows key + R. Inside the text box, type ‘% AppData%’ and tap on Enter to open the hidden app cache folder of Windows installation.
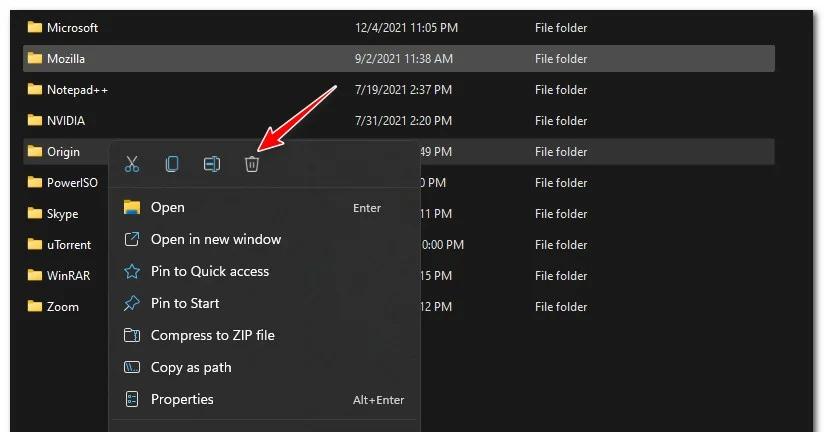
- When the AppData folder is opened, scroll down and find out Origin’s one through the list of cache folders.
- Now right-click on it, and from the context menu, select Delete that just appeared.
- Reboot the system and wait to complete the next startup.
- Now latest Origin version install from the official download page and check if the 20:2 Origin installation error is fixed or not.
If still the error is there, then apply the next solution.
7. Uninstall Conflicting VPN
Origin installer denied the connection if you are using a VPN, ping booster or tunnelling as it detects a filter connection. In this situation, there is not any complete solution. Only you have to disable or uninstall the VPN that creates conflict temporarily. After that, reinstall the Origin again.
Here is one solution. According to many users, this method works well.
- To open a Run dialog box, press the Windows key + R. Inside the text box, type ‘appwiz.cpl’ and tap on Enter to open the Programs and Features menu.
- If prompted by the User Account Control (UAC)menu, tap on Yes to get admin access.
- Once the Programs and Features menu opens, scroll down and find out the conflicting VPN software via the programs list.
- Now right-click on the VPN tool, then in the context menu, tap on the Uninstall.
- Follow the guidelines to complete the process and run the Origin installer to check if the error is removed or still there.
8. Use Non Thin Client Origin Installer
If you install the Origin with Non Thin client Origin Installer, you can resolve the problem and fix the 20:2 error completely. This Origin installer version is a huge file, so not required to unpack by windows installer during installation.
Here’s how you can do it in simple steps.
- Go to the official download page from your browser to download the latest Origin non-thin client installer version.
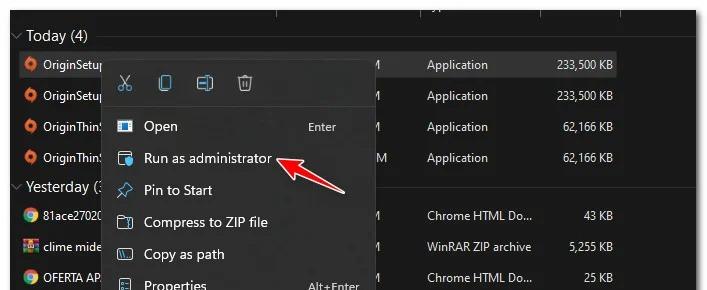
- After completing the download, right-click on a new installer that recently downloaded, then from the context menu, tap on the Run as Administrator.
- When opening the installation window, tap on the Install Origin, follow the on-screen guidelines, and complete the installation and now the 20:2 error should be resolved.
- Wait for the installation to complete, then restart the system to check if the process is complete.
Final Words
These are the easy step to fix the Origin Won’t Install with Error Code 20:2. Apply these steps and say bay to error and enjoy it.