The primary cause of the remote device won’t accept the connection error is due to antivirus or some proxy settings. You can resolve the issue in few steps. First, turn off the proxy settings, resetting Microsoft Edge to factory settings, resetting the gateway IP address, and disable the antivirus protection.
How to Fix the remote device or resource won’t accept the connection windows 10 Error
For window 10 users, here are the details to fix the error. It depends on the situation, but here are the several reasons that are:
- The IP config issue
- On Windows 10 a proxy setting was enabled
- Antivirus program default settings of them might have changed
- Changes were made within the Microsoft Edge web browser
- The Firewall settings problem
Read about: How to Fix a Hulu Error Code 2(-998) and Hulu Error 2 (-975)
How to Fix a Remote Device won’t Accept the Connection Error?
Disable the proxy settings
- Press the Windows key + R, then type the inetcpl.cpl and press the Enter.

- Move to the Connections tab.
- Select the LAN settings option.

- Go to the Local Area Network Settings, then Window unchecks the Use a proxy server for the LAN option. Dont forget to check through the Auto-detect settings
- Apply the changes.
Now refresh the web browser and connect it as the mentioned above will be fixed The remote device or resource won’t accept the connection issue.
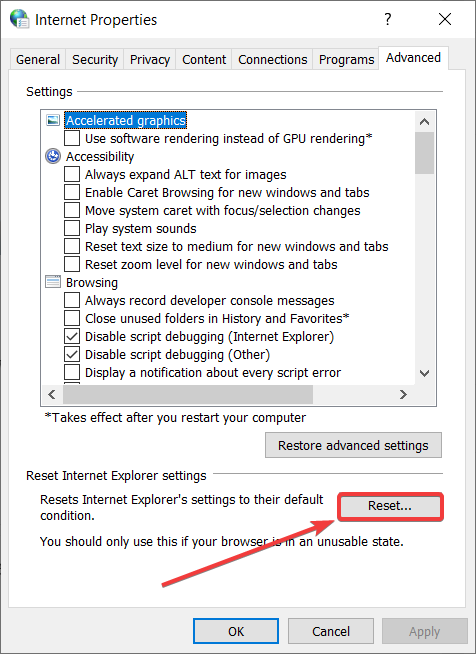
Resetting the Microsoft Edge to factory settings
- Go to the internet options, and from the results, tap on the feature.

- Go to the Advanced tab.
- Tap on the Reset icon from the bottom of that Window.

- If you get a notification, then tap on OK and from the window select Reset.
Resetting the gateway IP address
- For this process, follow all the steps above in the first step of this post are explained.
- Now in the search box, type cmd, and to open the Command Prompt with admin rights, choose the Run as administrator.
- Type the ipconfig/release and click on Enter.
- Now, wait and then type ipconfig/renew and tap on Enter.
- Now close the cmd window in the end and try to connect.
Turn off the antivirus protection and disable Firewall
If antivirus software is not set correctly, the network connection error sometimes occurs in Windows 10. By disabling it temporarily, you can analyze the cause of the error, whether it is due to an antivirus program or something else.
You can also disable the Firewall protection temporarily to check it. Now connect it and check everything is properly working, and then change the antivirus settings.
Final Words
Above mentioned steps are tested, and you can now use network connections without any issue.


