


A factory reset, also known as a master reset or hard reset, is restoring a device, such as a computer, smartphone, tablet, or other electronic device, to its original factory settings. It means that all data, applications, and settings the user has added or modified will be deleted, and the device will return to the state it was in when it left the factory.
Why You Should Perform a Factory Reset
The main reasons for performing a factory reset include:
Troubleshooting
When a device is experiencing software issues, glitches, or performance problems, a factory reset can often resolve these issues by clearing out any corrupted data or problematic settings.
Selling or giving away a device
Before selling or giving away your device, performing a factory reset to ensure your data is removed and the new user starts with a clean slate is a good practice.
Security
If you’ve lost your device or it has been stolen, a factory reset can help protect your personal information and prevent unauthorized access to your data.
Device Cleanup
Over time, a device may become cluttered with unused apps, files, and settings. A factory reset can help clean up the machine and improve its performance.
It’s important to note that a factory reset will erase all data on the device, including photos, videos, documents, and apps, so it’s crucial to back up any critical data before proceeding. The exact method for performing a factory reset varies depending on the device and its operating system, so it’s essential to follow the specific instructions provided by the device’s manufacturer or functional system developer.
Here is all about RAM Type DDR3 & DDR4 For Windows 10
How to Backing Up Your Data with a Time Machine Before Factory Reset
Backing up your data with Time Machine before a factory reset is a good practice to ensure you don’t lose any important files. Time Machine is a built-in backup feature on macOS that makes it easy to create regular backups. Here’s how to back up your data with Time Machine before performing a factory reset:
Connect an External Hard Drive
You will need an external hard drive or a network-attached storage (NAS) device to use as a backup destination. Make sure it has enough storage capacity to hold your backup.
Open Time Machine Preferences
- Click on the Apple menu in the top-left corner of your screen.
- Select “System Preferences.”
- Click on “Time Machine.”
Select Backup Disk
In the Time Machine preferences window, you’ll see an option to select a backup disk. Click the “Select Disk” button.
Choose Your External Drive
Choose your external hard drive or NAS device from the list of available disks and click “Use Disk.” It will set it as your Time Machine backup destination.
Configure Time Machine Options (Optional)
Time Machine will start the backup process automatically, but you can click the “Options” button to exclude specific folders or files from the backup.
Start the Backup
Once you’ve selected your backup disk and configured any options, Time Machine will start the initial backup process. It may take some time, depending on the size of your data and the speed of your external drive.
Monitor the Backup Progress
You can monitor the backup progress in the Time Machine menu in the top-right corner of your screen. It will display the status of the backup and the time since the last backup.
Regularly Back Up
Time Machine will back up your data in the background automatically. Keeping your external drive connected and powered on ensures regular backups.
Perform the Factory Reset
Once your data is safely backed up with Time Machine, you can proceed with the factory reset of your Mac.
Restore Data
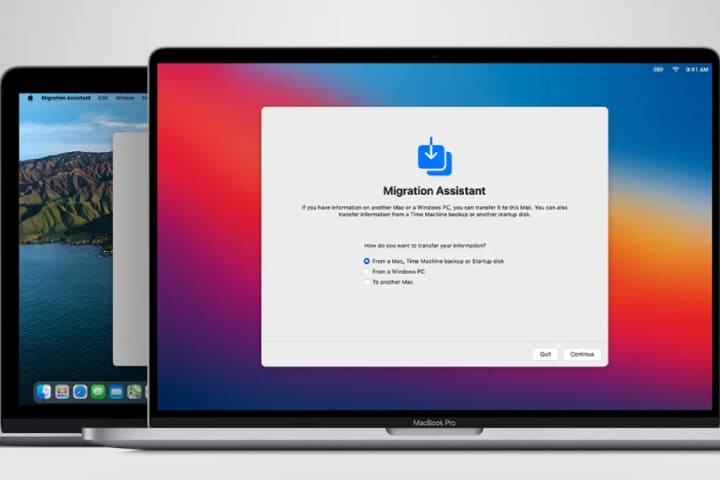
After the factory reset, you can use Time Machine to restore your data. You can do this during the macOS setup or afterward by connecting the external drive, opening Time Machine, and selecting the files or folders you want to restore.
Following these steps, you can ensure that your important data is safely backed up before performing a factory reset on your Mac using Time Machine. This way, you can restore your files and settings after the reset.
How to Factory Resetting Your MacBook Air
To factory reset your MacBook Air, you’ll need to erase all the data and settings on the device, effectively returning it to its original, out-of-the-box state. Here are the steps to do a factory reset:
Before you begin, ensure you’ve backed up any critical data you want to keep, as this process will erase everything on your MacBook Air.
Backup Your Data
Connect an external hard drive or use a cloud backup service like iCloud to back up your important files, documents, photos, and any other data you want to keep.
Sign Out of Your Apple ID
Click on the Apple menu in the top-left corner of the screen and choose “System Preferences.”
- Click on your Apple ID.
- Select “Overview” from the left sidebar.
- Click the “Sign Out” button and follow the prompts to sign out of your Apple ID.
Disable FileVault (if enabled)
- FileVault is disk encryption. If it’s enabled, you should decrypt your disk before proceeding.
- Go to “System Preferences” > “Security & Privacy” > “FileVault.” Click the lock icon to make changes, and then follow the prompts to disable FileVault.
Sign Out of iCloud (if applicable)
If you use iCloud, go to “System Preferences” > “Apple ID” and sign out of your iCloud account.
Open iTunes if it’s installed, go to “Account” > “Authorizations” > “Deauthorize This Computer.” Sign in with your Apple ID and password.
Internet Recovery
Shut down your MacBook Air.
Boot into Recovery Mode
Turn on your MacBook Air and immediately press and hold the “Command (⌘)” and “R” keys simultaneously until you see the Apple logo.
Erase Your Hard Drive
- In the macOS Utilities window, select “Disk Utility” and click “Continue.”
- In Disk Utility, select your startup disk (usually named “Macintosh HD” or something similar) from the left sidebar.
- Click the “Erase” button in the toolbar.
- Choose a name for your disk, select “Mac OS Extended (Journaled)” as the format, and click “Erase.”
Reinstall macOS
- Exit Disk Utility and choose “Reinstall macOS” from the macOS Utilities window.
- Follow the on-screen instructions to reinstall macOS on your MacBook Air.
Complete Setup
After macOS is reinstalled, your MacBook Air will reboot, and you’ll be greeted with the initial setup screen. Follow the prompts to set up your MacBook Air as if it were a new device.
Restore Your Data
If you backed up your data earlier, you can restore it from your backup source (external drive, iCloud, etc.).
How to Reset MacBook Pro
Resetting your MacBook Pro can mean different things, so I’ll provide instructions for a few scenarios. Try the one that best according to your needs:
Soft Reset
If you’re experiencing software issues and just want to give your MacBook Pro a fresh start without losing data, you can perform a soft reset.
- Shut down your MacBook Pro
- After it’s completely powered off, wait for a few seconds.
- Turn it back on.
- This simple restart can often resolve minor glitches and issues.
Resetting SMC (System Management Controller)
If you’re facing issues with hardware functions (like battery, fans, or power management), resetting the SMC might help:
For MacBook Pro with a non-removable battery (after 2017):
- Shut down your MacBook Pro.
- Hold down the Shift + Control + Option + Power buttons simultaneously for about 10 seconds.
- Release all keys, then press the Power button again to turn on your MacBook Pro.
For MacBook Pro with a removable battery (older models):
- Shut down your MacBook Pro.
- Remove the battery.
- Press and hold the Power icon for 4 to 5 seconds.
- Reinstall the battery.
- Turn on your MacBook Pro.
Resetting NVRAM (Non-Volatile Random Access Memory)
If you’re having issues with settings like sound volume, display resolution, startup disk selection, and time zone information, you might want to reset the NVRAM:
- Shut down your MacBook Pro.
- Turn it on and immediately hold down the Option + Command + P + R
- Keep holding the keys down until your MacBook Pro restarts and you hear the startup sound for the second time.
Factory Reset (Erasing All Data)
If you want to completely wipe your MacBook Pro and start fresh, you’ll need to perform a factory reset. Before starting the process, just back up your important data:
Backup Your Data
- Use a Time Machine or any backup method of your choice to back up your data.
Sign Out of iCloud
- Go to Apple Menu > System Preferences > Apple ID, and sign out of iCloud.
Erase Your MacBook Pro
- Restart your MacBook Pro and hold down Command + R during the startup process to enter MacOS Recovery.
- Open Disk Utility, select your startup disk, and click on “Erase.”
- Choose the format (usually APFS) and click “Erase.”
- Exit Disk Utility.
Reinstall macOS
- In MacOS Recovery, select “Reinstall MacOS” and follow the on-screen instructions.
Restore from Backup
- After reinstalling MacOS, you can restore your data from the backup during the setup process.
Remember, a factory reset erases all data on your MacBook Pro, so be sure to back up any important files before proceeding. The specific steps might vary slightly depending on your MacBook Pro model and the version of MacOS installed. If you’re unsure or have specific questions, it’s always a good idea to consult the official Apple support resources or contact Apple Support for assistance.
Closing Thoughts
That’s it! Your MacBook Air is now reset to its factory default settings. Keep your backups safe; you’ll need them to recover your data on your freshly reset MacBook Air.